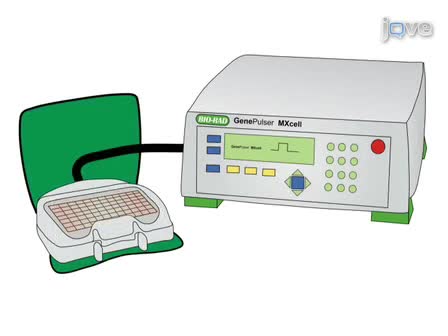
Harvesting Bone Marrow From Femurs and Tibiae The first step of the procedure is to harvest bone marrow from the femurs and tibiae of a 6- to 12-week old mouse (we are using BALB/c mice but you can do this procedure with any mouse strain). To begin, euthanize the mouse by CO2 inhalation (won’t be shown). Harvest femur and tibiae from the hind legs of each. Then, with a razor blade, cut each end of the femurs to remove the hip and knee joints and to expose the marrow. In a similar manner, cut each end of the tibiae to remove the knee and ankle adjacent regions and to expose the marrow. Take a 3 mL syringe with a 26-gauge needle and fill it with RPMI supplemented with 10% FBS, penicillin, streptomycin, and beta-mercaptoethanol (BME = 100 uM). Using tweezers, hold the bone over a Petri dish containing RPMI media. Insert the syringe needle into one end of the bone and depress the plunger to flush out the bone marrow. The syringe needle can be moved up and down inside the bone to flush out residual marrow. Repeat the procedure for all the bones, and then proceed with establishing the cultures. Establishing Cultures To establish the bone marrow cultures, pipette the flushed bone marrow up and down several times to break up the tissue into a cell suspension. Place a 70 micron filter on top of a 50 mL conical tube, and add the cell suspension to the filter. Rinse the Petri dish one time with RPMI, then add the rinse to the 70 micron filter. Using the rubber end of a 1 mL syringe plunger, grind the bone marrow pieces remaining on top of the 70 micron filter. Wash the filter one time with RPMI. After washing the filter, centrifuge the cell suspension at 1200 rpm for 5 minutes. Wash the cell pellet by resuspending in PBS. Count the cells using a hemocytometer. We typically obtain ~90 million cells from one mouse’s bones (two femurs plus two tibiae). After counting the cells, centrifuge them again at 1200 rpm for 5 minutes. Resuspend the cells in a small amount of RPMI and aliquot them into tissue culture flasks containing enough RPMI so that the final concentration is 1 million cells per mL. Add cytokines to promote the development of your cell type of interest. In this case, the cytokine interleukin-3 (IL-3 = 10 ng/mL) is added to promote the development of basophils and mast cells. To acquire basophils, incubate for 10 days. For mast cells, incubate for 5 weeks. When generating mast cells, the media and IL-3 should be changed once a week. Here is a look at how mast cells should appear just after plating. This image demonstrates the differentiation of mast marrow cells into basophils and mast cells 10 days after the addition of interleukin-3. Once the desired cell type is obtained, proceed with the electroporation step. Electroporating Cells To begin the electroporation step, determine the number of cells in the culture flask. Cells are typically electroporated at a density of 10 million per mL, so transfer the required cell number to conical tubes and centrifuge the tubes at 1200 rpm for 5 minutes. After centrifuging, aspirate the media, wash the cells with 1X PBS, and centrifuge again at 1200 rpm for 5 minutes. Aspirate the PBS and add Bio-Rad Gene Pulser electroporation buffer to make a cell suspension of 10 million cells per mL. After resuspending the cells, add the desired plasmid DNA at a final concentration of 10 to 20 micrograms per mL. Aliquot 150 microliters of the cell suspension into wells of your choice on a 96-well electroporation plate. Put the electroporation plate in the MXcell plate chamber and close the lid. Prior to transfection of mast cells, an electroporation protocol must be programmed into the MXcell unless using a preset or stored protocol. Through optimization experiments we have discovered that the highest transfection efficiencies of mast cells occur using square wave pulse protocols. We will vary the electroporation conditions on the plate to deliver 300V/20ms, 350/15ms, 350V/20ms, and 350V/10ms square wave pulses at 2000uF and 1000 ohms. Once the protocol has been set and loaded onto the device, press “Pulse” to electroporate the cells. After electroporation is complete, transfer the cells to a tissue culture plate. We typically transfer each 150 microliter electroporation sample to a well in a 48-well tissue culture plate containing 300 microliters RPMI (supplemented with 10% FCS, penicillin, streptomycin, and beta-mercaptoethanol) with 10 nanograms per mL interleukin-3. Cells are incubated overnight at 37°C, then assayed 24 hours later for expression and suppression. Transfection Results The fluorescent microscopy image of the cells after successful electroporation using 20 micrograms per mL GFP plasmid is shown in the video. Using the MXcell electroporation system transfection efficiencies of about 30% can be obtained. The system allows you to vary conditions to maximize your transfection efficiency, while maintaining cell viability.